Ever wondered how to antique a mirror and add a timeless charm to your home décor? Whether you’re transforming a flea market find or giving a modern piece a nostalgic twist, antiquing a mirror is a satisfying and surprisingly easy DIY project.
In this comprehensive guide, you’ll learn step-by-step how to antique a mirror, including essential supplies, safety tips, and different aging techniques to achieve that beautiful distressed look.
Why Learn How to Antique a Mirror?
Antique-style mirrors offer a unique aesthetic. They bring warmth, character, and a rustic elegance that modern mirrors often lack. With the right method, you can turn any regular mirror into a vintage masterpiece without breaking the bank.
Plus, it’s an eco-friendly way to upcycle old home decor!
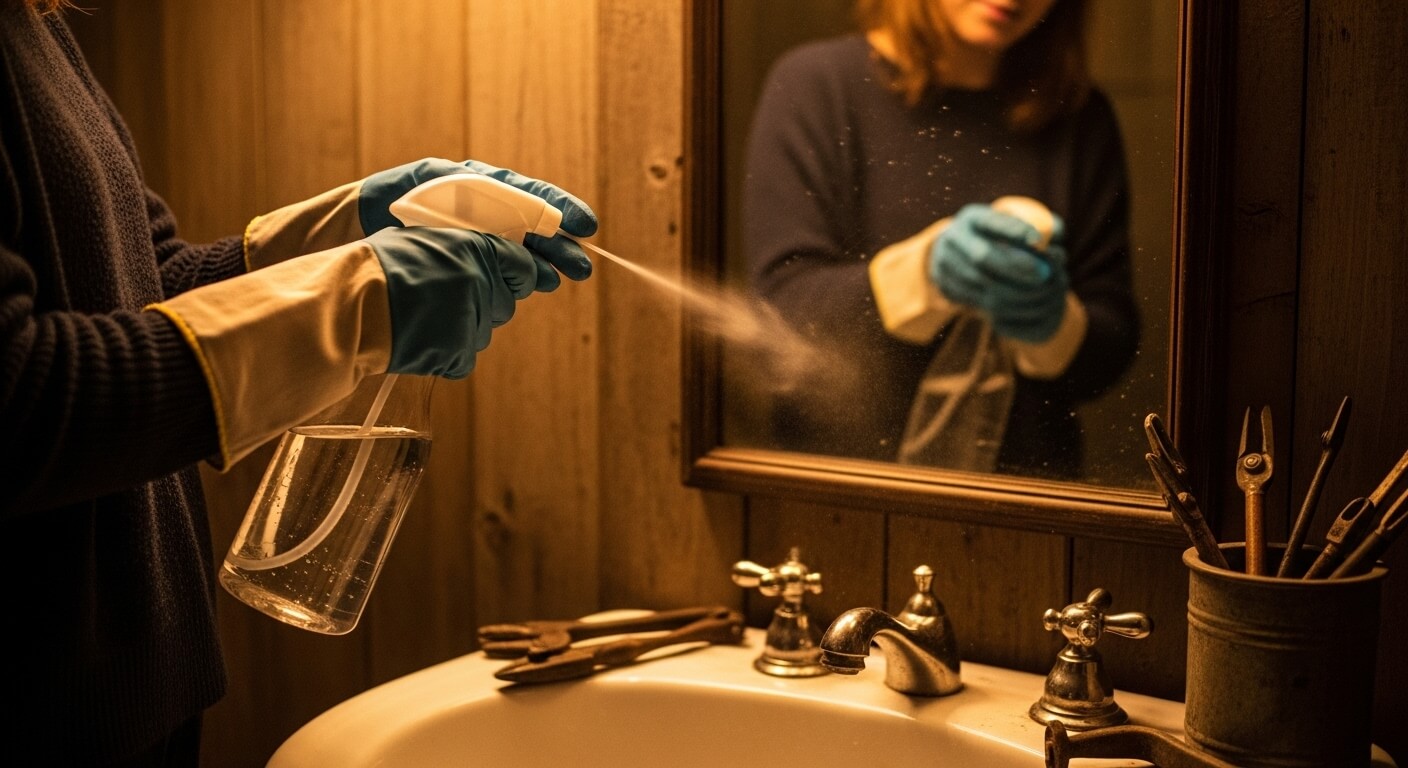
Supplies You’ll Need
Before diving into how to antique a mirror, gather the following materials:
- Protective gloves and eyewear
- Spray bottle
- Paint stripper or acetone
- Vinegar or muriatic acid
- Scraper or putty knife
- Black or gold spray paint (optional)
- Soft cloths or paper towels
- Painter’s tape
- Drop cloth or old newspaper
Safety Note: Always work in a well-ventilated area and wear gloves and goggles when handling chemicals like paint stripper or acid.
Step-by-Step: How to Antique a Mirror
Remove the Mirror from the Frame
Carefully disassemble the mirror from its frame. If it’s a framed wall mirror, remove backing and screws using a screwdriver.
Protect the Front Surface
Tape plastic or newspaper over the front of the mirror to prevent damage while you work on the back.
Remove the Back Coating
Spray acetone or paint stripper on the back of the mirror to dissolve the protective paint layer. Wait 5–10 minutes, then scrape gently.
Pro Tip: Use a plastic scraper to avoid scratching the mirror.
Apply Distressing Solution
Spray a 50/50 mix of vinegar and water—or muriatic acid for stronger effects—on the exposed reflective coating. This step is crucial in how to antique a mirror effectively.
Let it sit briefly, then dab off gently to create that “foxing” or aged appearance.
Add Background Paint
To deepen the vintage look, spray a thin layer of black or metallic gold paint over the distressed areas. This adds depth and contrast.
Reassemble and Clean
Remove tape and plastic, reattach the mirror to the frame, and wipe the front gently with a damp cloth.
Best Styles to Complement Your Antique Mirror
Learning how to antique a mirror opens creative doors. These decor styles pair beautifully with your DIY vintage mirror:
- Farmhouse – Pair with rustic wood and white accents.
- Boho – Mix with vibrant colors and textures.
- Shabby Chic – Combine with pastel furniture and floral prints.
- Industrial – Set against metal and brick elements.
Tips for Success
- Test on a small area first to get the desired aging effect.
- Use gold leaf for an extra antique vibe.
- Work slowly—once the silvering is removed, it can’t be restored.
- Consider framing with ornate or reclaimed wood frames.
Common Mistakes to Avoid
Even experienced DIYers can slip up. Avoid these common errors:
- Over-stripping the back coating
- Letting acid sit too long
- Skipping safety gear
- Using too much paint afterward
External Resources on Antiquing
For more in-depth techniques and visuals, check out these helpful guides:
- This Old House’s Mirror Aging Tutorial
- Martha Stewart’s Vintage Mirror DIY
- YouTube – DIY Mirror Antiquing Techniques
Final Thoughts: Embrace the Imperfection
Learning how to antique a mirror is about embracing imperfection. Each blemish, speck, and streak tells a story. Whether you’re decorating a gallery wall or adding character to a vanity, an antique mirror adds soul to any space.
So roll up your sleeves, grab those gloves, and start your vintage mirror transformation today.
FAQs: How to Antique a Mirror
Can I antique any mirror?
Most mirrors can be antiqued, but older ones may already be delicate. Always test first.
What’s the best acid to use?
White vinegar is safe and effective for beginners. Muriatic acid works faster but requires more caution.
How long does the process take?
From start to finish, expect 1–2 hours depending on the size of the mirror.